Showing posts with label Sewing. Show all posts

5/1/12

Anna's Flair - Boutique Set

Wooo, Buddy!  We are neck-deep in first birthday plans over here!  I did finish up a "Flair" set for a friend's daughter.  The set includes a boutique initial onesie, a stacked boutique hair bow and a matching tutu.  I love how it turned out!


I'll be pretty scarce around here for the next week, but check back in next week for the party posts!


Linking up to: 
Transformation Thursday at The Shabby Creek Cottage
Hookin' Up with HOH at House of Hepworths
Friday Favorites at Simply Sweet Home
Tickled Pink at 504 Main
Frugal Friday at The Shabby Nest
Friday Favs Party at Naptime Crafters
Whatcha Got Weekend at Lolly Jane Boutique
Weekend Wrap up Party at Tatertots and Jello
Saturday Seven at Positively Splendid
Sundae Scoop at I Heart Nap Time
Think Pink Sunday at Flamingo Toes
Market Yourself Monday at Sumo's Sweet Stuff
Made With Love at Sew Chatty
Just Something I Whipped Up at The Girl Creative
Take-A-Look Tuesday at Sugar Bee Crafts
Will See It Wednesday at Fabric Bows & More

Tip Junkie handmade projects


1/6/12

Shabby French Ruffle Cuff/Headband

I made it through to the next round of One Month to Win It, probably by the skin of my teeth!  Here is my project submission.  Did you guess which one was mine?

I was so excited about this week's theme, cause let me tell ya, I love me some Graphics Fairy!  The biggest challenge was narrowing down which graphics to use.

I settled on some sheet music and a fleur-de-lis and got to work on my Shabby French Ruffle Cuff!


First, I printed the graphics directly onto fabric using the freezer paper technique from The Scrap Shoppe.  This was seriously SO easy!  If you have an inkjet printer and didn't know you could print on fabric, head on over and let Michele tell you how it's done.  I feel like I've been missing out!

Then I cut a strip of sheet music from the fabric and ruffled it up with my trusty sewing machine and added some lace & trim.  To make the flower embellishment, I used the fleur-de-lis to cover a button and hot glued a bit of lace to the back.  I cut out a couple flowers and inked the edges, then stacked it all up and stitched it to the cuff.  I then added a length of black satin ribbon to each end and covered the back with a bit of black felt to finish it up!  All done! :)


BUT WAIT!  You didn't think that was all, did ya?  This Shabby French Ruffle Cuff lives a secret double life as a Shabby French Ruffle HEADBAND!  Just tie it around your head and you've got an accessory that pulls her own weight!


So there you have it!  A Shabby French Ruffle Cuff/Headband!  Do you have any accessories that pull double duty?

Linking up to these fun parties!

The Shabby French Ruffle Cuff/Headband was featured!

Creations by Kara

12/7/11

On-The-Go Pin Catcher

I've got a little project I've been working on for a Secret Santa swap that involves using quite a few pins. With a baby who's recently mobile, I needed a quick place to drop the pins where they would stick.

I grabbed a magnet, flipped it over & voila! Magnetic pin catcher. So handy!

11/16/11

Burp Cloths - Make It Work!

Sometimes I sit around dreaming up all the big fancy tools & machines I need to be able to make cute stuff. I bet you can relate!

I got some darling monogrammed burp cloths from my friend Ashley. I wanted to make some for baby gifts, but I don't have an embroidery machine. So, I made it work! I love how they turned out! (For the record, I don't have a die cut machine either - I just eyeballed the letters).

6/29/11

Bibs!

We're not using bibs yet, but before the little tike arrived, I whipped some out real quick. No, seriously.  They each took about 20 minutes, and that's including ironing.


I pulled some scraps and leftover fabric and mixed and matched to my heart's content.  I used this tutorial from Chickpea Sewing Studio - it was so simple!  Now we've got a little stack of cute, fun bibs! :)

6/1/11

It Runs in the Family

Do you remember who taught you to craft?  My grandma is my crafty hero.  She taught me to sew and she was resourceful and thrifty.  When people tell me I'll never have time to make stuff when I have a baby, I usually mention my grandma, who had NINE kids and still found time to sew.  Even outside of crafting, she was the kind of person you wanted to be.

Daniel and I decided years ago that if we had a daughter, we'd name her Eleanor for Grandma.

One of my favorite things in the nursery is this dress.  My grandma made it and my mom wore it as a baby.  It's amazing that it's still in such great condition - my mom was the third of seven girls!


I love that my mom saved this.  It's perfect for Ellie's room, made by the woman she was named after.

5/5/11

Nautical Bunting Quilt

I saw this quilt and knew I had to make one!  I just so happened to be taking part in a baby gift swap and my swap partner, Nikki was doing a nautical theme for her little guy.  So this was perfect!


I used a lot of fabrics from my stash and picked up a few quarters from the fabric store as well.  Because I used a solid navy back, I wanted to punch up the binding, so I made my own from a red and white polka dot calico using this tutorial.


And then I added an anchor applique because you can't have a nautical theme without an anchor!

Check it out - I'm linking up HERE!

4/24/11

Nursery In Progress No Longer!

And we're done!  I'm SO happy with how the nursery turned out!  I used some vintage floral sheets I had for inspiration.  If you're looking for a way to decorate while keeping costs down, this is a great way to do it!  About 6 yards of fabric for $2-4.  You can't beat that!


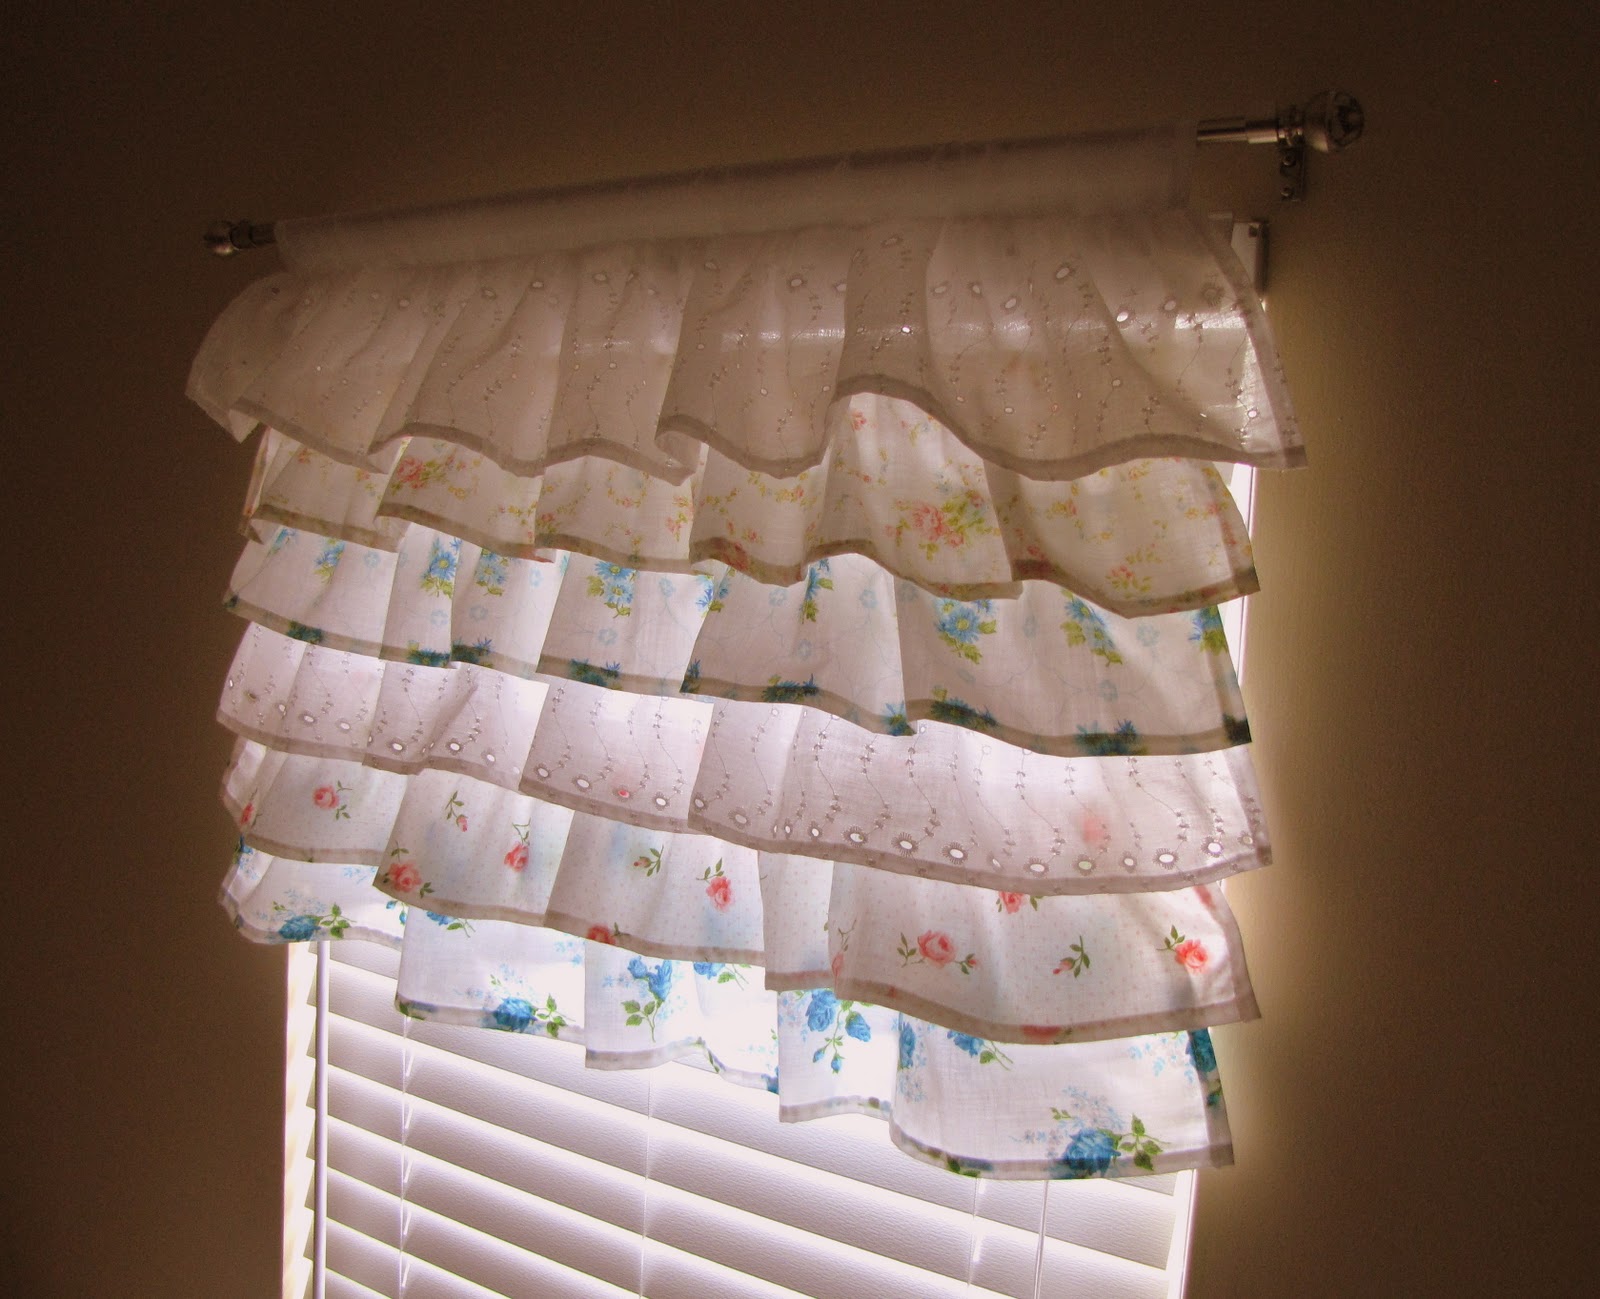
I made the curtain swag above the crib and hung it with some knobs found at Hobby Lobby.  Curtain swag, name bunting, ruffled curtain, lovey blanket, crib sheets and crib skirt (inspiration) all were made using vintage floral sheets.


Most of the stuff on the walls I painted/distressed.  The little rocking chair is one I had as a wee one, with a new coat of paint.


The quilt on the back of the glider was my baby quilt, made by my grandmother.


I need to fill the frames with pics!  I painted the "E".  Doll, bunny and piggy bank were mine.


That dress is what we'll bring the baby home in!

Check out the parties I'm linking up to HERE!

Make sure to check out my hair bow giveaway!

3/29/11

Nursery In Progress: Name Bunting

Little by little, I'm getting things ticked off my to do list.  This weekend, I'll be working on getting everything up on the walls.  And by "I", of course I mean "Daniel".  :)

I made this to go over the crib using the same fabrics as the curtain.  I've actually used these in quite a few other things in the room.


Hopefully, I'll have a bunch of new pics to share next week!

3/16/11

Nursery In Progress: Ruffled Curtain

When I saw this ruffled curtain, I knew I had to somehow incorporate it into my house.  When we found out Little One was a girl, I had the perfect spot! 


I'm going with a shabby chic theme in the nursery and trying my best to use what I've got on hand.  Luckily, I have a nice little collection of vintage sheets (some of which are now fat quarters listed in my shop).  I mixed and matched and added and edited until I was happy. 


I used my ruffler foot for the first time.  I broke my first two needles.  We got in our first fight, the ruffler foot and I, but we made up.  I used four different vintage sheets (which have so far also found their way into a crib skirt, bunting, crib sheets and a lovey) and added in some eyelet from my Grandma's stash.


It's a little on the narrow side, but there's no fixing that now, so I'm just going to pretend it fits! :)

Linking up to:
Pity Party


Transformation Thursday

Katie's Nesting Spot

3/10/11

Scrappy Ribbon Garland

A few weeks ago, I sold some bows in a consignment sale.  I displayed them on white pegboard, and I knew it would look orderly and colorful, but I still felt the need to punch up the display.


If you know me, you know my favorite kinds of crafts are simple and not time-consuming.  I also love using what I have on hand whenever possible!  I had a ton of ribbon scraps left over from making the bows, so I got a pile out and started sewing.  It's that easy - just keep feeding scraps through your presser foot until your garland is the length you want!


Stitch a length of ribbon at each end to string it up and you're done!


If you're not the DIY-type, I also have these available in my shop.

I'm linking up:

Look What I Made
Tip Junkie handmade projects


Transformation Thursday

Katie's Nesting Spot

1/13/11

Flower and Doll Pattern Search

When my sister and I were wee little things, my Grandma made us these flower buds that unfurled into a flower with a little surprise in the middle. 


My surprise was a doll.  Amber's was a family of three tiny bunnies.


We had SO much fun playing with these!  I would love to make one, but I cannot find a pattern for this anywhere.  Can anyone help me out?

Also, I added a few things to my etsy shop - finally!


1/11/11

Headband Organizer in Less Than 15 Minutes!

I had my headbands strapped onto a roll of paper towels sitting in my bathroom for several months until I ran out of paper towels one day. For another month or so, they just sat in a jumbled up heap on the sink. I couldn't take it anymore. Neccessity breeds invention, right?


I grabbed some ribbon, buttons, needle and thread and got to work.  Fifteen minutes later, my headbands were lined up in an orderly fashion and hanging on the wall, out of the way.

I just took about a yard and a half of ribbon and doubled it over.  I handstitched a button to both layers every couple of inches, added a bow and a loop to the top and filled it up! :) 


It works for clips, too!


Linking up to these fun parties!

The headband organizer was featured!


Creations by Kara

Hairland

kimbo's crafts

8/24/10

Party Favors AKA That Time My Camera Failed Me

AKA that time my crafting results turned out to be less than I hoped for, but I just said "Eh." and went with it.  Also, then my camera took fuzzy pictures but I didn't realize it until the subjects of the photos were already dispersed.  You gotta work with what you got.

I made some fancy koozies and upped the ante on our birthday tiaras for my mom's 50th birthday weekend.  Let's start with the tiaras, since they're not quite as embarrassing.  I got a pack of 4 "Happy Birthday" tiaras from the dollar store and added some scraps of fabric and fabric flowers.  Also, I added a butterfly to my mom's tiara that I received in a swap.  Crafting down that stash!

The birthday girl's tiara:


And the tiaras for the party girls:


You know how sometimes the idea in your head doesn't exactly come to fruition like you thought it would? I present to you:  The Scrappy Ruffly Koozie That Didn't Live Up To Its Full Potential


Please note the wrinkly, slouchy fabric and the crooked ruffles.

Also, the worst part:


I wreaked this havoc with the freezer paper stencil technique.  I thought if I started with a layer of white, it would make the color pop from the fabric.  Well.  Not only did I just end up with a white outline on all the letters, it somehow slipped my notice that I had, in fact, used NEON yellow.  Now, I'm not advocating drunkenness, but I'm sure these would look MUCH cuter after your third wine cooler.


Creations by Kara
Related Posts Plugin for WordPress, Blogger...