


 This weekend was the kickoff for college football. We're in the South and it's a huge deal. Daniel and I are die-hard Vols. We got our season tickets in the mail last week (Woot!) and we meet his dad for almost every home game. The first game is on Monday and then in two weeks, the first home game. Not only do we get the excitement of the first home game, we get to share it with his parents and our nephew, Tripp. We can scarcely stand the wait!
Now, onward! To the Football edition of Saturday Seven.
 1. Little Tiny Edible Footballs - Who says football has to be all manly, huh? Leave it to us crafty types to feminize anything. Or to masculinize anything, depending on which way you look at it.
Bakerella has turned her delicious Oreo truffles into these deliciously adorable tiny edible footballs.
 2. DIY Stadium Cushions - Can you imagine the possibilities for these stadium cushions from Steve & Cathie of Creative Juice? Use iron-on vinyl and you can make any fabric into a perfectly adorable cush for your tush. And if you've ever been to Neyland Stadium, you will understand the beauty of that. And if you're planning on taking one to Neyland, make sure it's no more than 12 inches. None of this recliner-seatback nonsense. There's no room for that. In fact, I've been known to "accidentally" knock those people in the head with my knee. On purpose.
 3. Football Cozy - I would totally make this if I got along with crochet hooks. Which I don't. But Alicia of Create! does, and it's adorable!
4. Football Scarf - This would be so perfect for the last few games of the season here. You know, when it's frigid and they're all out of hot chocolate? You can buy the pattern for this football scarf by dianelangan at her etsy shop, which has lots of other amazing patterns, too.
 5. UT Necklace - I have never seen this method of incorporating ribbon into a necklace, but I'm in love! I mean seriously, who wouldn't want to wear this beautiful necklace from etsy seller notplainjane? I'll even forgive her for being a Georgia Bulldog! :) Check out her shop for other styles and colors. If you don't see what you're looking for, you can request one in your preferred color palette.
 6. Raider Handbag - I love the pleats in this handbag from craftster user Diesels_Mom. All the details put into it make it look very professional.
 7. Patriots Illusion Scarf - The pattern sneaks up on you in this scarf from craftster user Rumpazel. It's very impressive, especially for her first designed pattern!

 First, why do I have this ugly headband? Because I got it from Claire's in a 10/$5 sale as part of a 2-band pack. The other headband in the pack was solid orange, and being a huge Vol fan, I thought I'd get some wear out of that one. So I bought the pack.
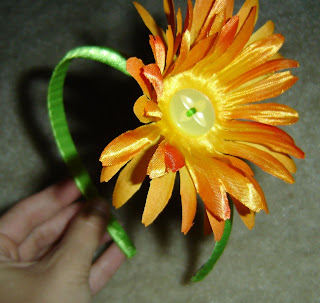 Second, you may wonder to yourself why I, a 26 year old woman, would want to wear a giant flower headband. I will probably give this to one of the little girls at church who would appreciate it more and not get made fun of. Though I might wear it this football season, since it's still orange, conveniently. :)


 1.
1. 
 3.
3.  4.
4.  5.
5.  And because I couldn't decide between the two, another shout-out goes to
  6.
6. 

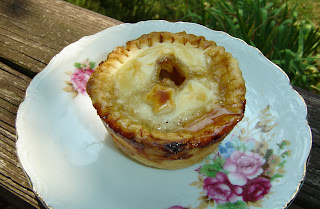
 I just mushed all the pie dough scraps into one big ball, rolled it out and cut it into rectangle-ish shapes. Then I sprinkled a cinnamon sugar mixture over all of it and baked it at 400 degrees until they didn't look raw anymore. The original idea was to use them to dip the apple butter, but that didn't work and they're perfectly tasty on their own!
 2.
2.  3.
3.  4.
4.  5.
5.  6.
6.  7.
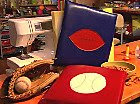
7.  Pitiful. I know they're cheap, but I couldn't bring myself to throw them out. They'd already made a trip days long accross several states, feeling inferior to the "perfect" rings. I knew they had to feel dejected when they arrived at my home. I knew God had a special plan for them. So I brought them in and gave them somewhere to stay while they eagerly anticipated what was in store for them. After months of planning (or procrastinating, take your pick) I decided it was their time. They'd been patient. They'd been quiet and unassuming. It was time to make them great. So I got out my glue gun, some fake flowers, beads, buttons, sequins and my magic weapon. Magic that could instantly make anything more awesome. That's right, my stash of glitter glue pens.
  Then I got to work. And here's what we ended up with. The process is pretty easy, but if you feel like a tutorial would be helpful, let me know and I'll post one!


 4.
4.